


Once was the days when it would take me two plus hours just to cull through an 8 hour wedding day. TWO HOURS!! That’s after it took my cards another two hours just to dump onto my computer. When you’re a business creative, who in the world has two hours to sit and cull through photos?! I sure didn’t.
I was using Lightroom to cull, and the rendering time (this is the program reading all the raw information from a photo and processing that information. The pictures blurry before it’s rendered in Lightroom) was what was taking forever.
Then it just so happened, one day, someone in one of the many photography Facebook groups I follow someone posted that they couldn’t handle this obnoxious time any longer, and they were reaching out for help. Another photographer posted this article about photo mechanic that was an absolute GAME CHANGER!!!!! Trevor Dayley is the man behind that post and I’ve learned so much from his fstoppers articles! (More of that coming in other blogs!)
So what exactly is Photo Mechanic, and how did it IMPROVE my workflow?!
1. Photo Mechanic keeps me insanely organized!
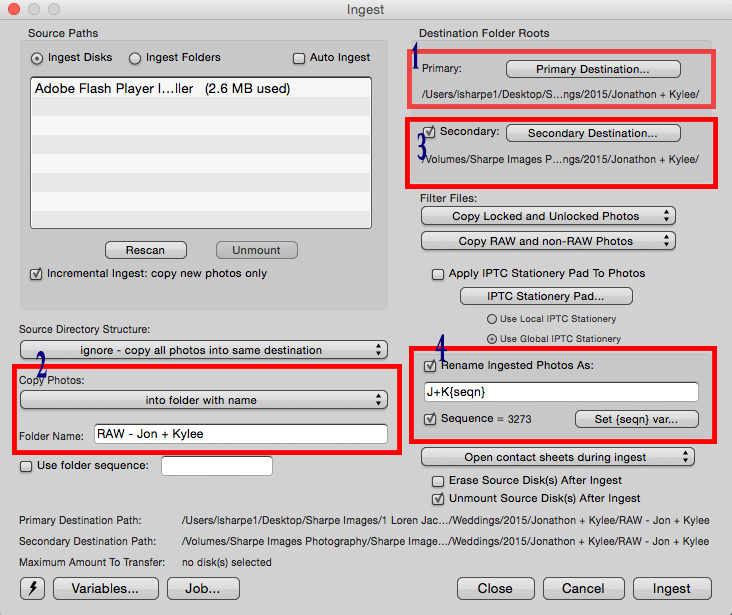
One of my biggest pet peeves is ORGANIZATION! I have to be organized, or my head is going to fall off. With Photo Mechanic, when I ingest my cards (dump them onto my computer), I can create folders right away inside the program (#1) , and then create a folder for the RAWs (#2). I name that folder RAW – John and Jane, so when I import my keepers into lightroom, I know which collection is which.
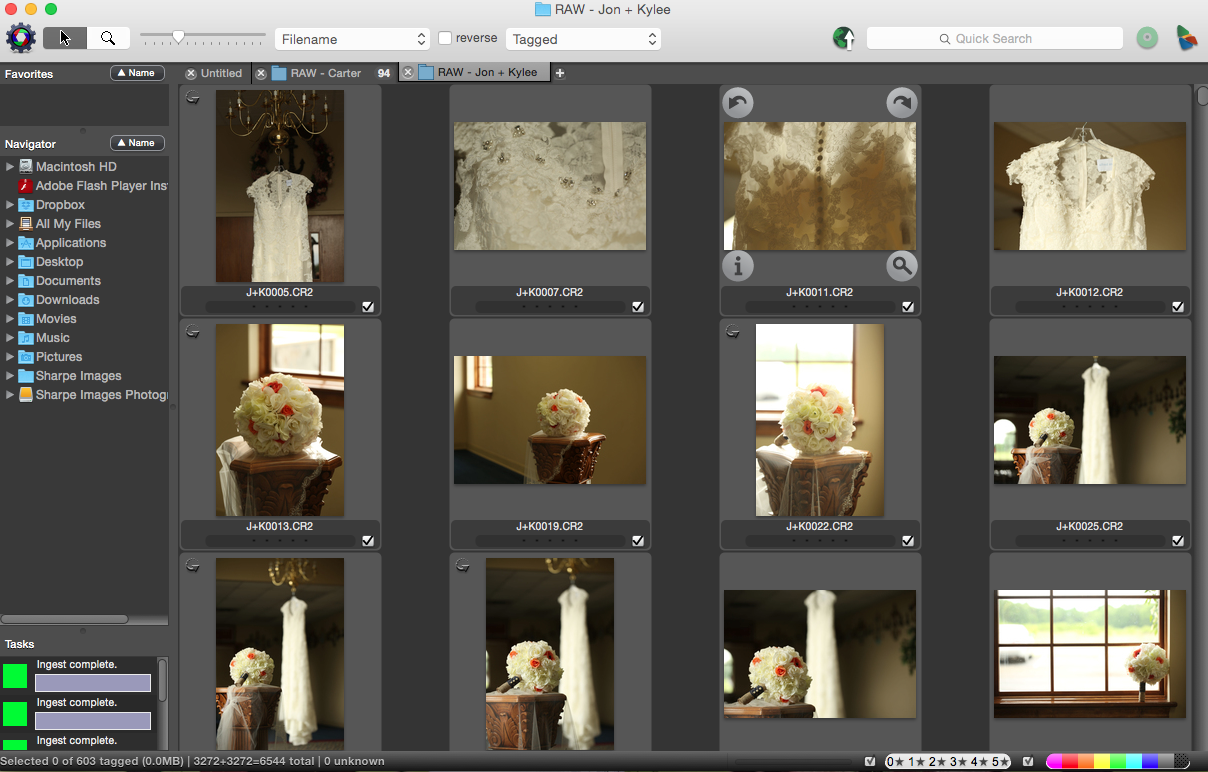
2. Photo Mechanic is incredibly fast at culling
When the photos are done ingesting, I start with the very first photo in the contact sheet, double click it, and use the “T” button on my keyboard to TAG the awesome photos I will later import into Lightroom, while using the down button to move through the photos. I culled my last wedding (3,000 photos) in 30 minutes. THAT’S AN HOUR AND HALF QUICKER THEN LIGHTROOM!!! SAY WHAT?!?!?!?! That means that I can get to editing that much quicker! Or I can spend that time saved pre-writing blog posts, answering emails, work on special surprises for my Brides, or even take a nap! 😉
3. It allows me to back up to my external hard drive, while dumping onto my computer
This is one of my favorite parts. Before Photo Mechanic, I could only do one thing at a time. Dump onto my computer, and then I would have to transfer 50-100 gigs of photos over to my external hard drive. Transferring that much data BOGS my computer down to the point where I might as well walk away and do something else productive with my name. Photo Mechanic allows me to ingest photos into two destinations (#3). The first destination is always my computer hard drive, and the second is always my external hard drive. I make the path ways to both locations the absolute same so there’s no confusion later when i’m looking for photos on the external. Again…organization!
4. I can rename photos right away
This feature isn’t necessary, and can me done in Lightroom at the end of your Lightroom workflow when you export, but I use this feature for my portrait sessions so it’s one less step I have to take in Lightroom. It’s simple and effective. (#4)
I hope this Tuesday Tip is as helpful for you as Trevor’s article on Fstoppers was for me. Be sure to check out that article and watch Trevor’s article because he walks you through all the steps.
You can sign up on Photo Mechanic and try it free for 30 days. I highly suggest giving it a try. It was one of the best $150 I spent last year. I can’t even begin to count how much time it has saved me over the 20 weddings, and 100 portrait sessions I’ve shot since making the purchase last spring!


[…] This program has been a LIFE saver for me and something I would consider a game changer in my business. I use to cull all my sessions in Lightroom and that could HOURS to do because Lightroom would take seconds to render the photo – make it so the photo is clear and not blurry. Photo Mechanic does the rending automatically. What use to take me two plus hours to cull now takes me 30-45 minutes. INCREDIBLE! I’ll get home from a wedding, (photos are already on my computer by the end of the reception) and if the struggle bus hasn’t already run me over, I can start culling reception photos. I cull backwards thanks to an awesome tip, again from Katelyn James! You can read that blog post here. The tagged, or favorite photos then just get dragged and dropped into Lightroom! I wrote a blog post on this incredible program this past summer that you can read here. […]
Thank you! Very helpful to a newbie on photo mechanic!